In this article, I’ll show you how to get rid of a lens flare in Photoshop in just a few simple steps!
How to Remove Lens Flare in Photoshop
How to Avoid Lens Flare In-Camera
If you don’t want a lens flare in your photo, try to avoid on location. Some lens flares are easy to remove in Photoshop, but sometimes it’s almost impossible to get rid of them. So it’s best to try to avoid them while shooting whenever possible. There are a few ways you can avoid harsh lens flares when shooting. First of all, use a lens hood. It’s designed to block light that causes lens flares. Even if you don’t think you need it, it’s better to use one.
If you don’t have a lens hood, make sure you’re aware of the position of the sun. You can try to use your hand as a lens hood and block the light that causes lens flares. The design of the lens itself is also important. Cheap lenses tend to cause lens flares more often. The design and special coatings of more expensive lenses prevent bad light from coming in.
How to Remove Lens Flare in Photoshop
If a lens flare still appeared after all the precautions, you can try to remove it with Photoshop. Photoshop has many tools available and more than one is able to remove lens flares. The more detailed the area covered by the flare is, the more difficult it is to remove it.
Removing Lens Flare With the Clone Stamp Tool
Let’s try to remove the lens flare in this image with the clone stamp first.
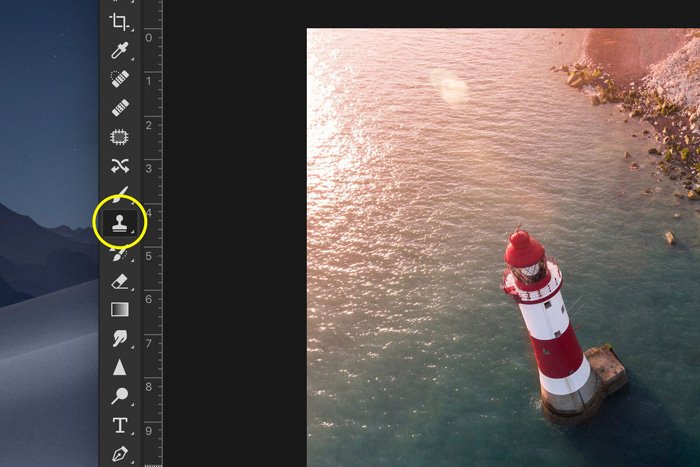
Step 1. Select the Clone Stamp Tool
Select the Clone Stamp tool in the toolbar on the right. You can also use the shortcut “S”.
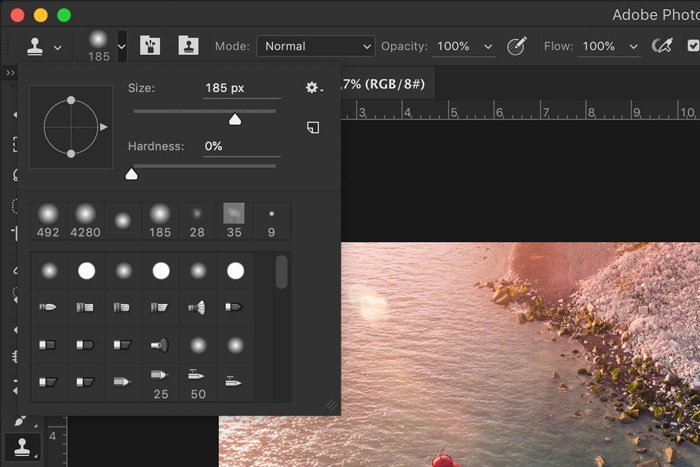
Set the size so it covers most of the lens flare. Also, set the hardness to 0%.
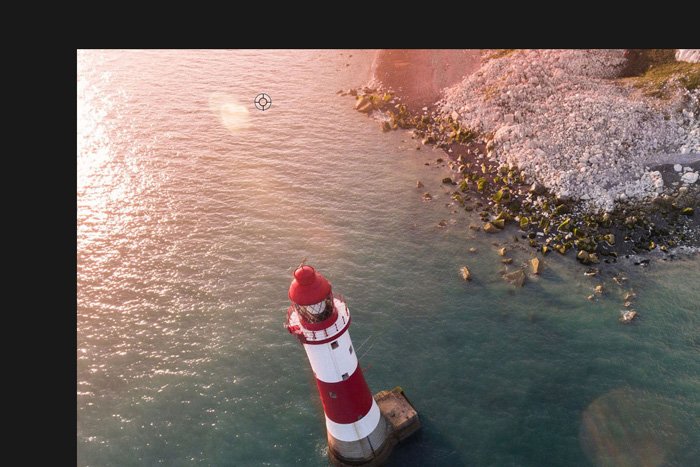
Step 2. Select a Clone Source
Hold the Option key (Alt for Windows) and click somewhere close to the lens flare. Photoshop will use these pixels to cover the lens flare. Make sure to select an area that looks like what’s covered by the flare.
Step 3. Paint Over the Flare
Now, paint over the flare until it’s gone. For the best result, you should use multiple clone sources. Select different areas around the lens flare.
Removing Lens Flare in Photoshop With Content-Aware
Another easy way to remove a lens flare in Photoshop is with Content-Aware Fill.
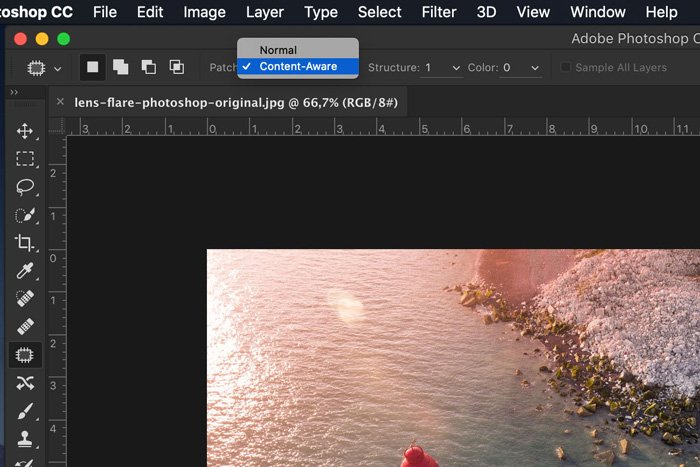
Step 1. Select the Patch Tool
Select the Patch tool. You can also use shortcut “J.”
In the top menu, set it to “Content-Aware.”
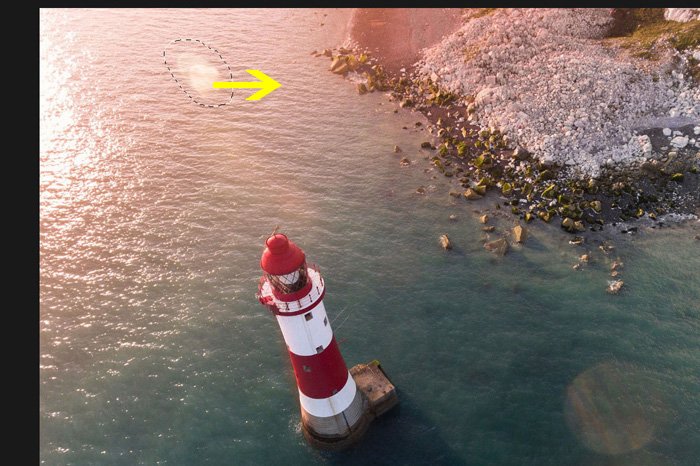
Step 2. Select the Lens Flare
Draw a selection around the lens fare. Leave a little bit of space between the edges of the lens flare and the selection.
Step 3. Drag to Remove
Now drag the selection to an area that looks like what’s covered by the flare. The selection will change and once you let go, Photoshop will add pixels to make the edges as smooth as possible.
If the result doesn’t look natural. Try again dragging the selection to another area close to the lens flare. You can also adjust the Structure settings in the top menu. Usually, it’s a matter of trial and error.
Conclusion: Street Photography Quotes
Unless you deliberately want a lens flare in your photo, you should always try to avoid lens flares when taking a photo. It’s possible to remove lens flare in Photoshop but depending on the photo, it can be really difficult. As always, try to take the best possible photo before you start editing. Check out our Effortless Editing with Lightroom to master all things post-processing!


title: “How To Remove Lens Flare In Photoshop Step By Step " ShowToc: true date: “2023-01-18” author: “Jerry Miller”
In this article, I’ll show you how to get rid of a lens flare in Photoshop in just a few simple steps!
How to Remove Lens Flare in Photoshop
How to Avoid Lens Flare In-Camera
If you don’t want a lens flare in your photo, try to avoid on location. Some lens flares are easy to remove in Photoshop, but sometimes it’s almost impossible to get rid of them. So it’s best to try to avoid them while shooting whenever possible. There are a few ways you can avoid harsh lens flares when shooting. First of all, use a lens hood. It’s designed to block light that causes lens flares. Even if you don’t think you need it, it’s better to use one.
If you don’t have a lens hood, make sure you’re aware of the position of the sun. You can try to use your hand as a lens hood and block the light that causes lens flares. The design of the lens itself is also important. Cheap lenses tend to cause lens flares more often. The design and special coatings of more expensive lenses prevent bad light from coming in.
How to Remove Lens Flare in Photoshop
If a lens flare still appeared after all the precautions, you can try to remove it with Photoshop. Photoshop has many tools available and more than one is able to remove lens flares. The more detailed the area covered by the flare is, the more difficult it is to remove it.
Removing Lens Flare With the Clone Stamp Tool
Let’s try to remove the lens flare in this image with the clone stamp first.
Step 1. Select the Clone Stamp Tool
Select the Clone Stamp tool in the toolbar on the right. You can also use the shortcut “S”.
Set the size so it covers most of the lens flare. Also, set the hardness to 0%.
Step 2. Select a Clone Source
Hold the Option key (Alt for Windows) and click somewhere close to the lens flare. Photoshop will use these pixels to cover the lens flare. Make sure to select an area that looks like what’s covered by the flare.
Step 3. Paint Over the Flare
Now, paint over the flare until it’s gone. For the best result, you should use multiple clone sources. Select different areas around the lens flare.
Removing Lens Flare in Photoshop With Content-Aware
Another easy way to remove a lens flare in Photoshop is with Content-Aware Fill.
Step 1. Select the Patch Tool
Select the Patch tool. You can also use shortcut “J.”
In the top menu, set it to “Content-Aware.”
Step 2. Select the Lens Flare
Draw a selection around the lens fare. Leave a little bit of space between the edges of the lens flare and the selection.
Step 3. Drag to Remove
Now drag the selection to an area that looks like what’s covered by the flare. The selection will change and once you let go, Photoshop will add pixels to make the edges as smooth as possible.
If the result doesn’t look natural. Try again dragging the selection to another area close to the lens flare. You can also adjust the Structure settings in the top menu. Usually, it’s a matter of trial and error.
Conclusion: Street Photography Quotes
Unless you deliberately want a lens flare in your photo, you should always try to avoid lens flares when taking a photo. It’s possible to remove lens flare in Photoshop but depending on the photo, it can be really difficult. As always, try to take the best possible photo before you start editing. Check out our Effortless Editing with Lightroom to master all things post-processing!
